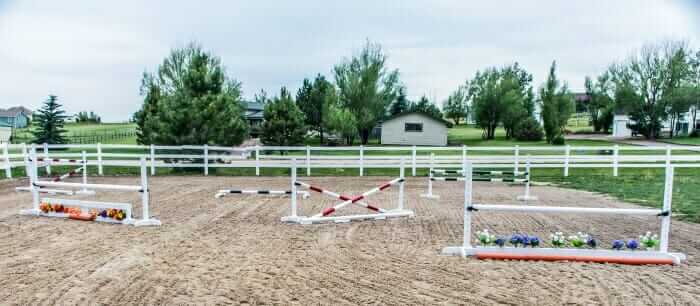
How To Build Horse Jumps
I have been building my own horse jumps for about as long as I have lived in the house I do now. So that would mean I have been in the jump building business for the last 12 years. That seems like a long time ago when I write it down.

But that also means I have had a loy of practice, and built a lot of jumps. If you were to ask me how many jumps I have built over the years, I honestly don’t know. I stopped counting after 1000. For me that was enough to know yeah, I can build horse jumps.
And with that many jumps built, I think I have figured out the good, the bad, and the indifferent when it comes to building horse jumps. And I wanted to give you some take away from my experience.
Building Your Own Jumps Isn’t Hard
It take practice, tools, and some basic carpentry skills, but building horse jumps really isn’t that hard to do. If you have never built anything before, some of the components of a jump are really easy to do.

A gate for example. All you need is 2 2×4’s, a couple of 1 x 3” or 1×4” wood and some 1 ½” wood screws. With that, you can build a gate.
Building the Standards
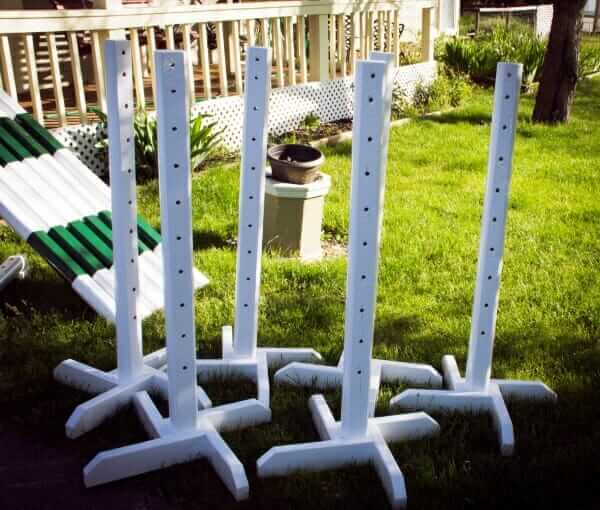
To build the standards is a little more work than a gate, but again, it isn’t that difficult. I like to use the red landscaping timbers you can find at Home Depot for around $4.00 each. They are 8’ long, so if you cut one in half, you will have a pair of 4 ft tall standards. This is a good starting point, in my opinion for jumping.
Once you have your standards cut to the height you want them to be, next you will be cutting the holes for the jump cups. Using a tape measure, start from the bottom at about 12”. You can start lower, or higher, whatever you like. But I have found that 12” is a good place to start with jumps.

Next using your tape measure, mark off every 3, 4, or 5” again, this is up to your personal preference. But keep in mind, for every mark you mark, you will need to drill a hole. If your marks are every 3” on a 48” standard, then you will be drilling 12 holes, PER standard. Yes, you are going to be drilling 24 holes into the wood. So think about how many holes you want to be drilling, seriously.
Once you have marked off your holes, then it’s time to drill. I personally like a spade bit. They last forever and only cost around $6.00, depending on where you buy them from. You will also need a drill. For drilling the holes, I prefer to use an 18-volt drill that you plug in. The rechargeable ones are great for screwing, but for the repetitive and long use of the holes we need to drill I like the plug-in type drill. And it really needs to be at least an 18volt drill. If yours is less than that, it’s ok, but it will take longer to drill all those holes!

After the holes are all drilled, now it’s time to sand the wood. I really like this part, honestly, I do! This is what makes the jumps look great, in my opinion. Ok, not just this step, but this is an important step in the entire process, because each step is very important and if you do your best on each part, you will have an incredible jump, or set of jumps!
Making The Base of the Jump Standard
Then you will need the bases of the standards. And you can use 2 x 4” or 2 x 6” lumber, it’s up to you. The most important part of making the feet for your standards is the length. The bare minimum you will want the feet to be is 16” long. I prefer at least 18” and the taller the standards, the longer my feet will be.

You don’t want to get cheap with the feet.
Especially the taller you will be jumping. As the jumps get taller, and bigger, the wider feet help to keep the jump stable. So for this example, our feet for our 4 ft standards will be 20” long. This will give us a very stable standard, and is still cost effective to build.
For each standard you will need 4 pieces of 2 x 4 (or 2 x 6) cut 20” long.
So using our pair of standards, we will need 8 20” pieces of wood, basically 8 pieces per pair of standards. And once I have cut the wood, I also like to cut the corner off the top on one side. This will remove one of the harsh corners. And even though I have never hit the edge of a standard doesn’t mean I don’t think about it all the time. And I like the way it looks too, cleaner lines in my opinion. Like something you would see at the horse show, and definitely not homemade.
To attach the 20” pieces to the standard, make sure you are on the bottom of the standard. Your give away clue will be the holes you have drilled. If the holes are where your wood is, your standard is upside down! Flip it over, and make sure each standard upright is this way. Then you will attach each piece of wood in a pinwheel fashion. Only attach one screw, and for these screws I use 3” decking screws. You can use bolts if you want to, but I have had very good success with these screws.

I have never had a jump fail because of these screws, so do what you feel best with. I like my screws.
Once you have all 4 pieces attached to the standard, turn it upright. How does it look? Are your feet square to the upright portion of your standard? Is your upright 90 degrees from the feet? If it is, great! If it isn’t, you can play with the feet a little until everything is square. Once it is, attach another screw to each piece of wood connecting the first piece to the second. Does that make sense?
Repeat this process with your other standard.
Tune In Next Week…
Once you are done, you will have a usable pair of schooling standards! Pretty cool don’t you think? And the best part is you built them yourself! Even if you had help, who cares! You did it!

So this walks you through the beginning of how to build a horse jump for yourself. Make sure to come back next week when I will finish the jump with you. Everything from what makes a standard look great to choosing the type of paint for your jumps!