Building Horse Jumps (Part 2)
Last week I shared with you the basics of building your own horse jumps. We covered the major part of a horse jump, building the standards. And this week we are going to finish what you need ot make your own horse jump.
Building your own horse jumps is not difficult, or impossible. It may seem like it the first time you make one, but it gets easier with practice. I also find it gets easier when you have an end goal in mind and you know what you are working toward.
Priming and Getting Ready To Paint
After I have built a pair of jump standards, I run over them one more time with an orbital sander. I want to make sure to get any splinters off as well as smooth out any rough edges. When I am happy with that I will use latex caulking to fill any gaps or cracks. The caulk is easy to work with, and finishes the standard. I feel this is really important at the base of the standard, where the feet have been attached.

Sometimes there will be gaps from where the feet meet the upright portion of the standard. And the caulk makes everything appear to be seamless, and one piece.
I also flip the standard over and caulk the bottom of the base. This helps to prevent the wood from rotting as well as minimizing any holes where creepy crawlers can live.
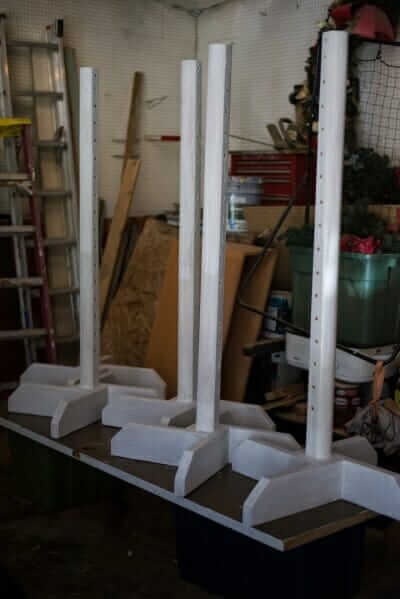
After I complete the caulking, I don’t wait for it to dry. I get to work with the primer. I paint the bottom with primer, and work my way up. It is easiest if you have a table that you can balance the standard on while turning it to paint the feet. And then I paint the upright portion, and move the standard out of the way so I can work on another one.
After the standards have been primered, I leave them to dry typically overnight. This gives me time to start working on the rails, and any fillers I will make.
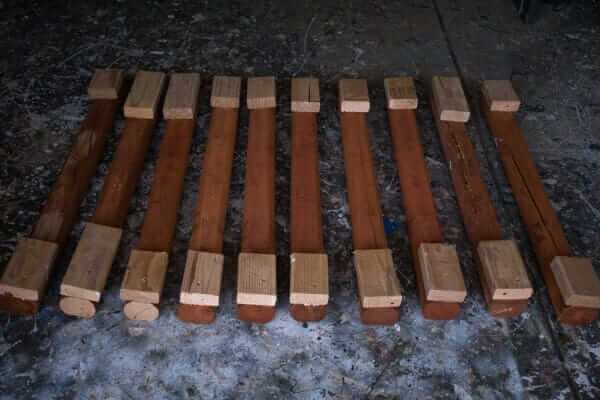
Choosing The Rails
The rails for your jump can be made affordably, and very easily. My favorite wood to use for rails are landscaping timbers. They are 8 feet long and about 3 ½: around. They have 2 flatter sides, but they are round enough that they work for being used as jump rails. They are also more affordable and easier to find than “REAL” jump rails. You can get a landscaping timber for around $4.00 at places like Home Depot. And sometimes around Memorial Day, Home Depot will have these timbers on sale for around $2.00. Which makes it even more affordable to build some jumps.
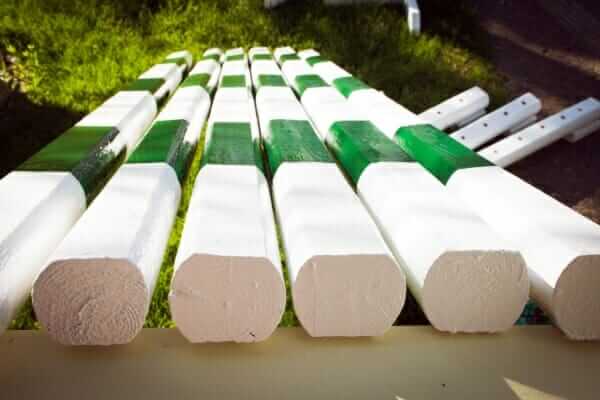
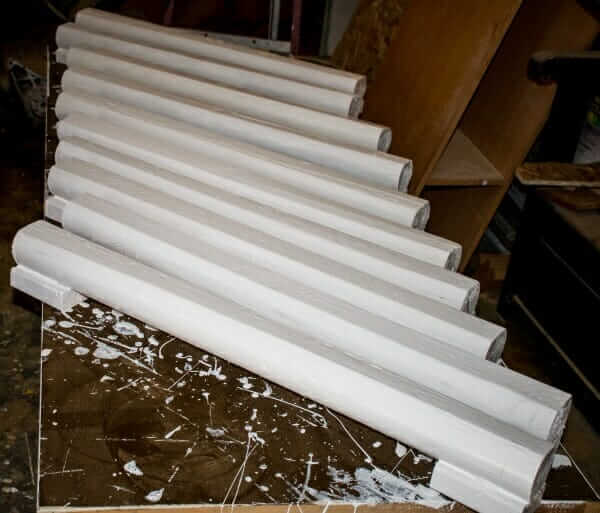
I will sand and caulk any gaps for these timbers, and then primer paint them. Again, I set the rails off to the side and allow them to dry overnight before I paint them with the finishing coat.
Making Flower Boxes
Flower boxes are easy to make, and add a finishing look to your jump. They add fill, and will help to make your jump look fuller, which makes it more inviting for your horse to jump.
All you need is 3 pieces of wood, 2 x 6 x 8 feet long. Sand all of the wood, and cut each piece in 4 foot sections. Then stand 2 of the pieces up on the ground, and attach another piece to the top. I prefer to pre-drill holes, so the wood doesn’t split.
Once you have built 2 boxes, you can drill holes in the top board. This is where you can place artificial flowers. I use the same ½” spade drill bit that I use to drill the holes for the jump cups on the standards. You don’t need to buy the “official” horse jump flowers for $25.00. Just go to Wal-Mart and buy the silk flowers they have. They cost $0.96 a piece, and if you drill 16 holes in your 2 boxes, you will need 16 bunches of flowers. So it will cost you $16.00 for flowers. It isn’t a huge saving, but it is less expensive. And if you are building 1o flower boxes with flowers, those couple of dollars you saved from each set of flowers will add up fast!
After you have completed drilling the holes, sand the boxes one more time, primer paint and allow to dry.
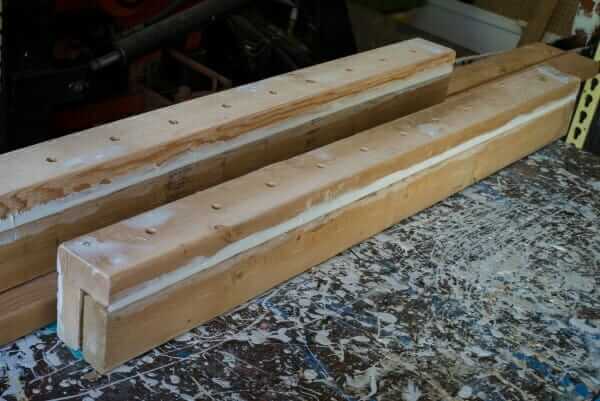
Making Raised Rails
I have to say I LOVE building raised rails. They are so easy and inexpensive to build. You will need a landscaping timber, cut into 3 or 4 foot sections, and some remnant 2 x 4 wood. Cut pieces of 2 x 4 about 6” long. Pre-drill 2 holes through them, and then attach them to the bottom of the landscaping timber. Sand everything, and primer paint.
If you want to use these for flowers, you can do that too, just drill some holes on the top of the timber. When I make these into flower rails, I don’t drill the holes all the way through, but you can if you want too. I just don’t want to see the flower stems coming through the bottom of the timber. I feel this is personal preference though, and if you want to, drill through the timber.
Choosing Your Paint
Now that we have made rails, flower boxes and raised rails and they have had time to dry, now is the time to paint them. This is the finishing step of building your jump!
When choosing your paint, you need to think about longevity of your paint. Yes, you can go to Home Depot and buy “oops” paint (paint that is really cheap because it was a miss-tint) and even though it may seem cheaper in the long run, it isn’t.
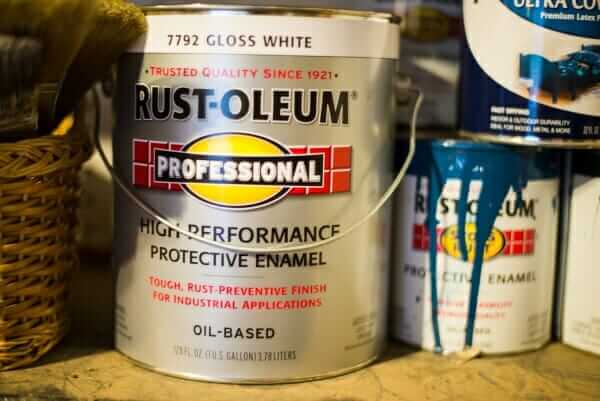
The best type of paint I have found for longevity is oil based paint, not latex. Oil based paint usually costs more than latex, but it’s because it lasts longer. I will typically buy Rustoleum paint for around $25.00 a gallon. And when you start buying fancy latex paint, it will cost just as much if not more than the oil based paint. And latex paint, no matter how good it is, will not last as long as the oil based one. Latex paint chips and gets marked up easily. Oil based paint will not chip, or come off near as easily. SO if you paint your jumps with oil based paint you will save time and money in the long run.
No matter which paint you choose, be sure to get exterior paint, even if your jumps will live in an indoor arena. Exterior paint just lasts longer, and works the best for horse jumps.
When painting all of your pieces, keep in mind it will take time between the coats of paint to dry. If you are using oil based paint, use multiple light coats and allow the paint to dry in between the coats. If you glop on the paint, you will have runs in the paint. Multiple light coats of paint will make your jump pieces look beautiful, and professional.
Assembling The Jump
By now you have painted all your jump pieces, and allowed them to fully dry. They should look beautiful! And now it is time to set up your jump.
The only thing you may be missing are the jump cups. You can go cheap, or all out when it comes to jump cups. And my most favorite ones are the one-handed jump cups from Dapple Equine. They are not cheap, but they last forever! And you never have to worry about losing the pins with these cups, because there are no pins. They have an almost rubberized coating that protects the cups from the weather. These jump cups cost around $25.00 a pair, but they do last forever. And in my experience, if you want to buy the best, these jump cups are worth the investment.
But if you aren’t too sure of how many jumps you want to make, or you are just getting started, there is nothing wrong with the cheap jump cups. I will typically buy the less expensive cups when I am making a set of jumps to sell. I figure that if someone wants to invest the money into the more expensive cups, they can. But to keep the cost of the jumps lower, I stick with the cheap cups.
I have found the least expensive cups at State Line Tack. If you wait until they have a sale, you can get them for about $ 4.25 for a pair. And sometimes you can get them even cheaper. Just before Christmas, I took advantage of a 30% off sale State Line Tack was having, and I got 25 pair of jump cups for $85.00, including shipping. That put the cost of the cups at around $3.40 a pair.
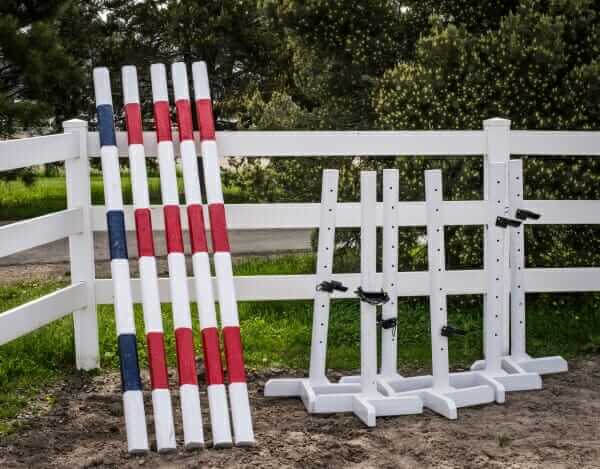
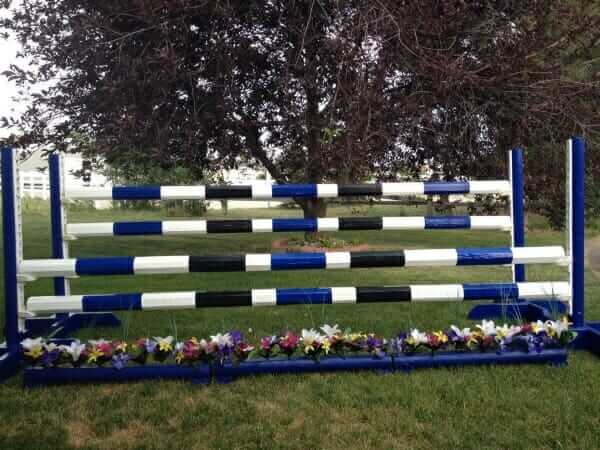
Once you have your jump cups, now you can finally assemble your jump!
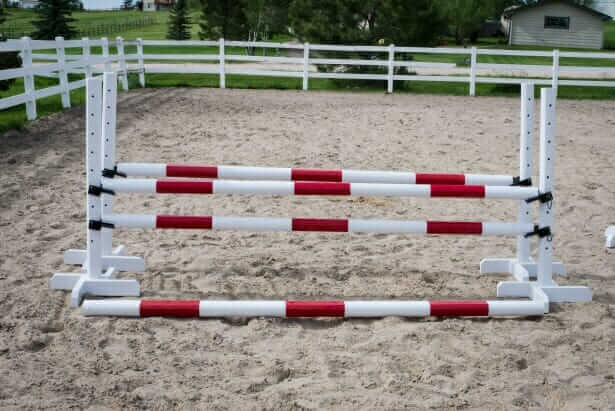
Put the cups on, and add your rails. If you made flower boxes, set them just before the jump. And if you made raised rails, you can set these up in front of the flower boxes.
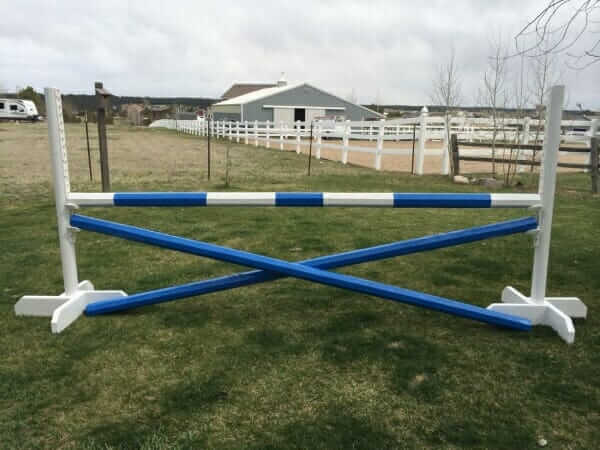
Get creative with your jump! You can use 2 rails for a vertical, or a cross rail. You can use 3 rails to make a starburst vertical. Or if you built 2 sets of standards, you can make an oxer.
There are so many different combinations of jumps you can make with just a few rails, some standards and filler items.
You can build one jump at a time, or an entire ring full of jumps. You are only limited by your imagination! And if you would like to see videos of the jump building process you can find a lot over on my YouTube channel, The Budget Equestrian.
I hope you have fun building some jumps for yourself, and I wish you all the best in your jump building endeavor!